Jim Krause | Classes | P354/J560 Program Graphics & Animation
Lab 5
Agenda:
- Take PS Quiz
- Short break
- Midterm Project Proposal (due Tuesday)
- AE recap:
- Tour of After Effects (continued)
- (sample: sailing PSD)
- Bouncing Ball exercise
Review Sample Midterm Projects
Recap: Organizing projects and files
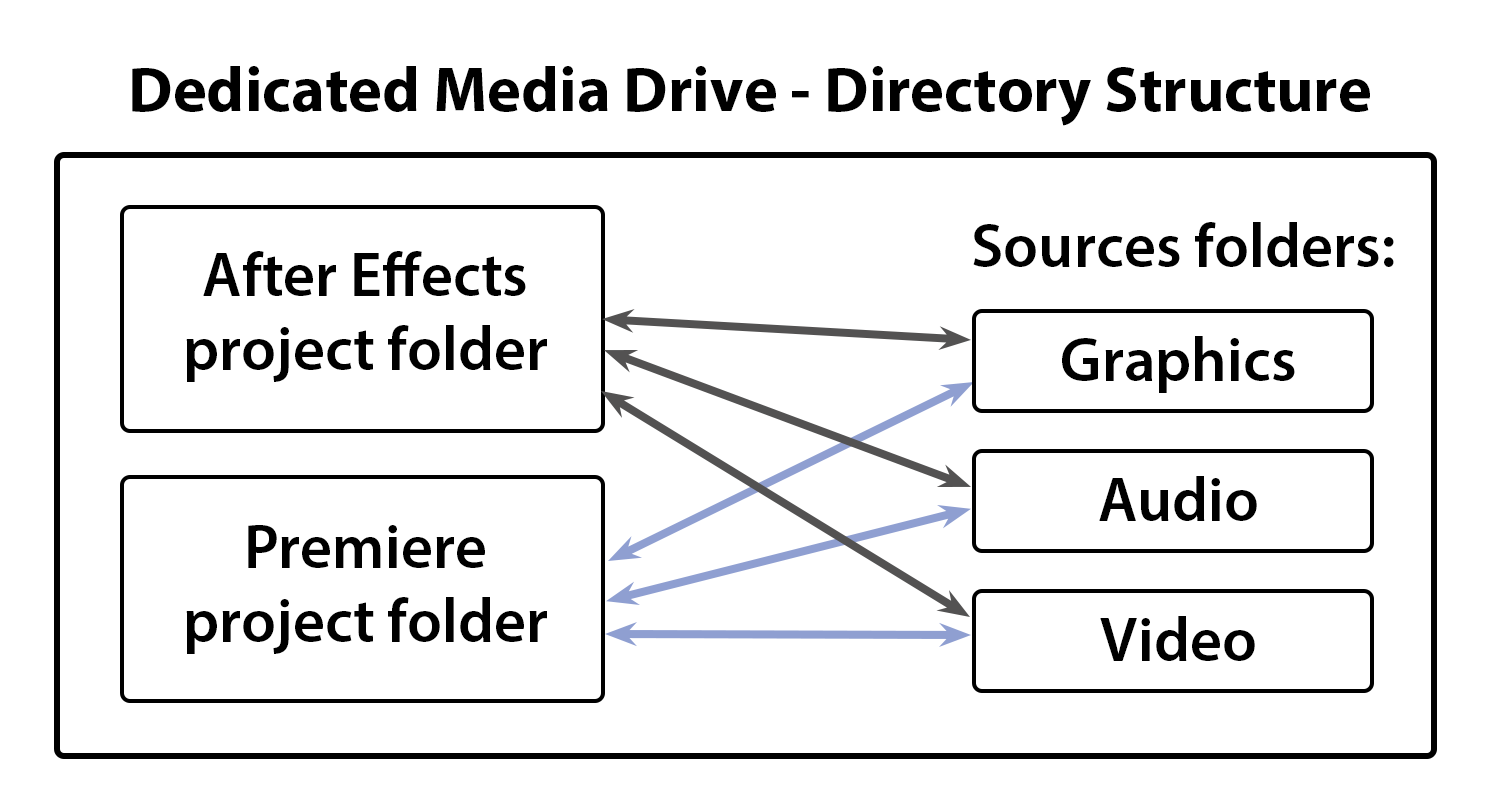
Remember to keep your projects and media on a dedicated media drive. You do NOT want it on your system drive (the drive with your system folder and applications) or else it will fill up with media, and render and cache files.
AE project files MUST retain the same relationship with imported media files, just like with video editing software. (A common beginner mistake is editing footage from the desktop, downloads, or another random place.)
Before starting an editing or animation project, take the time to setup folders for your source files.

Whenever you get footage for a project, take the time to move it to the proper folder BEFORE you import it.
Stop and think before you import any media! Move your footage into the proper media folder before importing. It's also crucial that your media source files retain the same physical relationship with your project files- in other words, don't move them or your footage will go off-line.
The benfit of keeping your projects and footage organized like this is that it's easy to back up the entire project to another drive (which is highly recommended).
Speed & Safety - Back up your work - Make a practice of routinely copying the entire media folder (which contains all of your projects and media) onto another drive.-or better yet, multiple drives.
AE (recap)
Importing Photoshop layers:
You can import Photoshop files either as footage or as a comp. When you import files as footage, you can select individual layers but you lose positioning information.
When you import a Photoshop file as a comp, It retains all the layers and positioning.
Creating compositions:
- Command+ N = create a new comp
- Command+ K = show comp settings
Adding layers to comps can be done easily by dragging items into either the composition window or the timeline. (Cmd-/ will place the selected source file in your comp.)
Warning: Wherever your time indicator is becomes the in point for your layer.
Change background color. The background layer can be set to any color you want. When you render/make a movie and choose “RGB + Alpha” and “Millions of Colors +”, it renders the background as transparent, making an alpha channel in the movie.
Basic Transform Properties - Basic properties you can animate in a layer include:
- A - Anchor point
- P - Position
- S - Scale
- R - Rotation
- T - OpaciTy.
The letter in bold is the keyboard shortcut for the property. You can display more than one property by holding the shift key.
Keyframes
For any animation to happen you need at least two keyframes. This is the basis of animation.
You can set an initial keyframe for a layer by clicking on the stopwatch icon. Anytime you change the parameter you've clicked the stopwatch icon for, a new keyframe is automatically created wherever your position indicator is. An X will appear in the keyframe box.
You can navigate from keyframe to keyframe by the arrow icons. You can remove a keyframe by highlighting it and pressing delete or by unchecking the check box to the left.
Keyframe interpolation - You can set how keyframes react temporally and spatially (time and space). Temporal keyframes effect how the keyframe is applied over time (slow down, speed up, stop) Spatial keyframes effect how the keyframe effects the layer within the space of the composition.
AE (continued)
Keyframes
You can set keyframes to be linear, auto bezier, or continous bezier.
Linear keyframes mean the change will occor at a constant rate. Spatially, objects would move in a straight line. Temporally, objects effects will take place at a steady rate of speed.
Anchor points - Objects revolve around their anchor points. Zooming in and out is also done around the layer's anchor point.
It's usually best to move a layer's anchor point before animating the layer. You can move an anchor point with the Pan Behnd tool or double click the layer to open up the layer window. Then you can use the Move tool (V). Carry out a few simple anchor point moves to make sure you can move an anchor point.
Precompose - You can precompose a layer or multiple layers in After Effects. Precomposing is a way of nesting animated elements, and is often the answer to vexing animation problems.
Imagine you wanted to animate a car going down across the screen with turning wheels. You could first rotate the wheels on the car, then pre-compose the car and the wheels. Then you can move the nested comp (the car with the spinning wheels) down the road.
To pre-compose layers, select the layers you want to pre-compose, (Command - select to pick layers that are not right next to each other) then choose pre-compose under the layer menu.
Pixel Aspect Ratio (Are you square?)
You may have noticed that some the videos on sites like YouTube are stretched or squeezed the wrong way. This is because the movies have not been exported at the proper pixel dimensions or have an improper pixel aspect ration embedded in them.
Full raster HD formats use square pixels. (1920x1080 & 1280x720) However some subsets of these such as HDV, DVCProHD, and & XDCam HD use non-square pixels. The DV format also uses non-square pixels.
![]()
Blending Modes - Blending modes determine how a layer mixes with the layers beneath it. (These work just like Photoshop.) Some work on alpha channels (stencil and silhouette) Some use lightness (Screen) Others use color. Blending modes can’t be animated.
Masks
You can use simple masks to isolate parts of a layer. These can be feathered and animated over time in interesting ways.
You can access masks in the Comp window (if the masks switch is turned on) or better et, through the layer window. (To get to the layer window, double click on the layer in the timeline.)
Masks are useful for quick & dirty “text builds" (E.g. revealing one bullet point at a time). Dog Haikus TIFF
Effects
Similar to Photoshop, the effects are organized into categories. Effects are applied to a layer (remember layers can contain comps, images or audio). Some effects can be manipulated by the properties of other layers.
Effect Categories
- 3D Channel
- Adjust - lets you alter levels, brightness, contrast & color.
- Audio - provides limited audio effects
- Blur & Sharpen - focus effects
- Channel - lets you tweak the color channels
- Distort - manipulate & distort the layers image
- Expression Controls
- Image Control
- Keying
- Matte tools
- Noise & Grain
- Paint
- Perspective
- Render
- Simulation
- Stylize
- Text
- Time
- Transition
- Video
To view effects in the Timeline, select the layer, then press E. To view the Effects Control Window (a floating window), press Shift-Apple-T (or Shift - Control - T).
To set initial keyframes in the Effect Control Window click on the Stopwatch icon or Option - clicking the name of the effect.
Review spatial and temporal keyframe interpolation---------
Be sure you know:
- Anchor points - How to move and animate
- Duplicate items (comps, layers, etc.)
- Effects - How to apply and animate
- Masks - How to create, remove, animate, and feather
- Precompose layers
- Preferences - Change location & empty your disk cache
- Split layers
- Use the Graph Editor
In-Class Bouncing Ball Exercise (will start Wednesday and finish Thursday)
The goal is to get a realistic bounce, like in this example. This requires fine tuning the ball's keyframe spatial path and temporal interpretation.
- Start out with a 1920x1080 HD Comp (10 seconds is long enough)
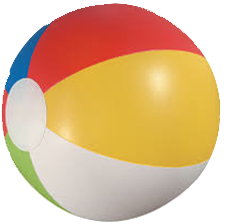
- Create a ball (hint: try using a shape layer) or use one of the balls below.
- Make sure the anchor point is in the center of the ball (hint: you might need to use the pan behind tool)
- Animate the ball bouncing across the screen in a realistic manner.
- Output a 1920x1080 H.264, MP4, or ProRes422 movie called ball and upload a copy to the appropriate Canvas assignment.


Homework (for Thursday):
- Watch How to Use the Graph Editor (Skillshare)
- Think of an idea for a Midterm Project - We'll share these Thursday. (Proposals are due next Tuesday.)


