

Jim Krause | Classes | P354/J560 Program Graphics & Animation
Week 12
Announcements:
- Final Project proposals are due next week. Storyboards are due the following week.
Agenda:
- Follow up on homework
- Motion tracking (continued)
- Keying (Thursday)
Review homework - Questions/commments about what people made?
Multi-part Motion Tracking
As we saw in the last class, After Effect's tracking tools can be used to stablize video and to attach other elements. Let's focus on motion tracking, attaching other elements to our moving pixels.
Let's review the track point:
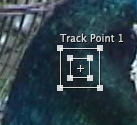
- The track point has two rectangles and an attach point.
- The smallest square is the feature region. It should surround the distinct feature to be tracked.
- The larger square is the search region. It is the area that AE will look for to find the distinct feature.
- The point in the middle is the attach point. It represents the place we can attach other elements. We can move this feature anywhere we want, it doesn't need to stay centered in the feature region. And the best element to attach can sometimes be a Null object, which can be used to control the position of other layers.
Motion Tracking Example:
Multipart Motion Tracking
The tracking example above is straightforward, but sometimes the pixels we're tracking disappear partially from view and we have to pick up on another area to track. For example, if we're tracking a car that drives behind a pole, the pixels we're tracking are blocked. This calls for multipart tracking.
The basic idea behind multipart tracking is that we select another area to track, without interuppting the track or moving the attach point.
Adobe has a help page dedicated to Tracking and stabilizing motion. Here's the part that shows the subtle differences in how the selection tool appears when moving various parts of the track point.
Multipart Tracking Exercise (5 points)
In this exercise, you'll show you can track an object, even though it moves out of the frame or is blocked. You'll need 1 piece of media from the Meyer DVD:
- LS_hihat_snare.mov
- alternatively, you can experiment with the KD_Sunflowers1_DV.mov clip, which was in the video files folder from last week.
If you have the Meyer book, follow the instructions in the Multipart Track tutorial (on page 511 from Chapter 30). Otherwise, follow these instructions:
- Make a 4x3 DV-sized comp to place the LS_hihat_snare.mov in
- Look at the video. The goal is to create three different text elements, which will be tracked along with the camera movement. The first element will appear in the green area underneath the hi-hat. (Create some text or other element to go there.) It will follow/track the hi-hat as it moves up, out of the frame. Another element will track up, along with and over the white drum head. (Create another text block or element, using the white drum head as a background.) The third element will track down, again in the green space following the camera move. These elements could be text, or anything else you want. Here's an example of what it could look like.
- Make a null layer to apply the track to.
- Track the movement of the LS_hihat_snare video. (The trick is to hold the "option" key to move the search and track square to another part of the video as needed.)
- Only use the Y (up and down) axis before applying to the Null layer
- Use the Smoother (Found under the "Window" menu to smooth out the bumps a bit.
- Make 2 separate elements to tie to the motion (1 for the camera tilting down, the other for the camera tilting up)
- Parent these to the Null layer
- Adjust for a pleasing look
- When you are finished, make sure it's called "multipart" and render out a full-size square pixel Apple ProRes 422, MP4, or H.264 version and upload it to the proper Canvas assignment.
Thursday ---------------------------------------------------------------------------
Keying in AE
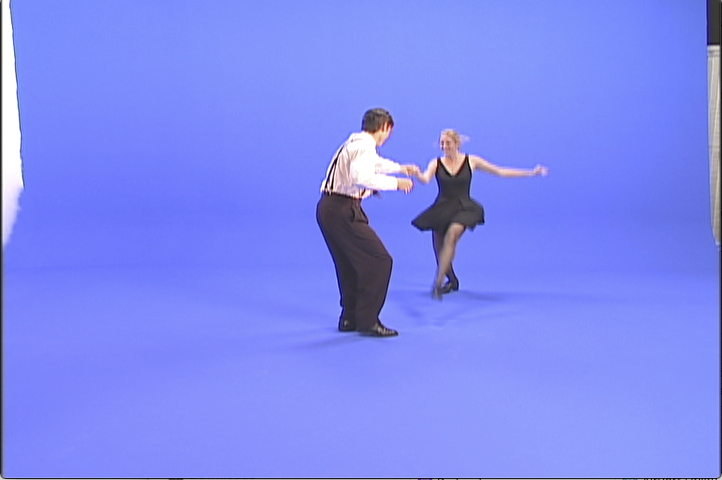
Download some sample bluescreen files and place them in your media/sources folder.
- Blue Dance clip, found in this 8 MB zip file
- Shia LaBeouf "Just Do It!" video
- Jean Claude Van Damme
- Adobe Stock footage.
After Effects has some excellent built-in keying tools- but the footage should be lit well and recorded with a codec that has good color space. Most HD video codecs are fine to use for chroma keying- but some codecs have more color information than others (4:1:1, 4:2:2). It's important that the background is evenly lit.
Setting up your clips (In AE or a video editing program)
Place your chromakey footage above the background. You will use the keying tools to remove the background to reveal the layer underneath.
Garbage matte (aka junk matte) - Often when footage is captured for chroma keying, there are areas not masked or covered by the blue or green screen material or paint. There might be rods, wires, edges of green screen backdrops, etc. These visual artifacts are typically outside of the subject's area of motion. Because they aren't the uniform blue or green required for color keying, we use what's called a garbage matte to get rid of them. In AE it's easy to use the pen tool to make a mask that serves as a garbage matte. It can easily be animated if needed. (Animate the mask path.)
Keys in AE
Below are some of the keys found in After Effects. For more help refer to Adobe's Keying Effects overiew.
- Color Difference Key - This key isn't the most intuitive keyer to use- but most of the good ones are like this. It has an additive eyedropper tool that allows you to easily create a good matte. It might be overwhelming for those new to keying.
- Color Range - This is frequently used for video work. It is simple to use and has additive and subtractive eyedropper tools.
- Difference Matte - A difference matte compares one layer to another and then keys out the info that's "different." This is usually used with footage shot from stationary cameras, or from motion controlled (repeatable) rigs. Imagine you have two layers, one is a static shot of a room. Another layer has the same shot, but a subject walks in. Using a Difference Matte, we can key out the subject.
- Extract - Similar to a luminance key, the Extract effect let's you key out either the brightest or darkest parts of an image.
- Key Cleaner - This is applied after the keying effect has been applied and is used to clean up and recover details lost in the keying process. There's a good tutorial from Brian Maffitt on how to clean up nasty chroma key footage. Brian Maffitt's lesson also contains exercise files.
- Keylight - This is an excellent keyer provided with AE and the one I recommend using for most video work. Check out the links below for additional tutorials on how to use it and make better mattes.
- Linear Color Key - This is a more sophisticated and easy to use color keyer with the interesting feature: you can use the + eyedropper tool to add to your matte or the - eyedropper tool to subtract multple times.
Mattes - After applying a key, it's often necessary to add a Matte Choker to fine-tune the edges. The matte choker and simple choker let you modify the matte created by the key. This is a quick and dirty way to eliminate the fringing often seen around the edges of keyed footage.
General tips:
- Place the footage to be keyed over/above the background layer.
- Use a garbage matte (mask in AE) to get rid of un-keyable elements.
- Use Keylight - Keep an eye on the matte. Ideally you want to adjust the settings until you get only black and white (what's keyed out and what remains visible).
- You will likely need to add an effect (Matte Choker, Simple Choker, Spill Suppresor, Key Cleaner, etc.) to get rid of an unwanted color fringe. The manipulating the Hue / Saturation helps.
Additional Keying Help & tutorials:
- IU Lynda login/portal
- VFX Keying Master Course by Steven Wright <- this is an entire set of lessons- a good one!
- Using Keylight by Trish & Chris Meyer <- This is part of an entire set of motion tracking and keying lessons.
- http://www.dailymotion.com/video/x1ipbx_tuto-after-effects-keying-keylight_tech
- Watch this 9-minute tutorial from Adobe's Jason Levine on LesterBanks.com.
Week 12 in-class Key Exercise
Demonstrate your understanding of chroma keying in AE by using two different examples in a single composition. (Make a comp large enough and long enough to hold two clips.)
Select an appropriate background for each clip. While surrealism is fine (E.g. you can place the dancers on the moon or Shia in your living room), make sure you fit them in believably. This means you should take care to match angles, perspectives, and lighting.
Turn in a full-sized, square pixel Apple ProRes 422, MP4, or H.264 version into the appropriate Week 12 Canvas assignment (Key Exercise).
Homework:
- Read & work through Meyer, Chapter 35 (Puppet Tool)
- Make a 15 or 30 second fake (or real) ad or PSA for anything that incorporates obvious Motion Tracking. Exmples:
- It must have:
- audio
- video
- a layer that is obviously motion tracked to a video layer
- Strong graphic design (CRAP!)
- Be sure to note what you did and how you carried out the motion tracking in the accompanying critique form.
- Watch these two videos, which feature the puppet tools:
- Beauty (9:49 - Classic paintings brought to life) A Short video by Rino Stefano Tagliafierro.
- You Gotta Believe (Music video sung by the Pointer Sisters, produced by Nina Paley.)
